- HOME
- >
- JAPANESE TISSUE TRANSFERS
- >
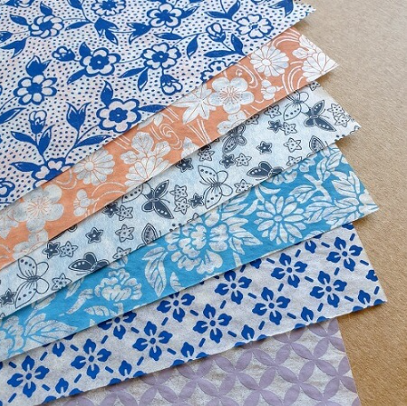
- JAPANESE TISSUE TRANSFER MIXED SAMPLE PACK
JAPANESE TISSUE TRANSFER MIXED SAMPLE PACK
The Starter Pack is the best way to explore and familiarize yourself with using transfer papers in your pottery and ceramic projects.
6 designs per pack.
JAPANESE TISSUE TRANSFER
Apply over bisque ware or over under-glazed pieces and cover with clear glaze
310 mm x 430mm Sheet Size
· You will need some water, scissors and a sponge.
· Cut the transfer Tissue paper, as required.
· Soak sponge and squeeze to remove excess water. In the case of thicker white transfer papers leave the sponge reasonably wet.
· Sponge lightly around the area where transfer will be applied
· Place transfer paper in the correct position on the unglazed surface with printed side facing down.
· Soak sponge again as in step 4.
· Start at one corner, press evenly over top of transfer paper with damp sponge. Take care not to wrinkle paper. Remoisten sponge if it dries: Too much water may cause the pattern to bleed.
· Leave to dry for 2-3 minutes
· Slowly peel off the transfer paper, checking print has transferred. If not, dampen again and leave a while to dry. The paper must be removed as it can leave a residue.
· Transparent coloured or clear glazes can be applied over the dry surface and then fired to the appropriate temperature between 1100ºC and 1300ºC.
· Transfers can also be applied over the top of a freshly glazed surface.
